Last Updated on by Azib Yaqoob
Do you want to properly install and set up W3 Total Cache?
W3 Total Cache is one of the best WordPress caching plugins and can help you easily improve WordPress speed and performance.
In this tutorial, I will show you how to properly set up the W3 Total Cache plugin in WordPress.
Why Should You Use W3 Total Cache?
W3 Total Cache improves your WordPress website performance and speeds it up. It reduces page load times by using features like CDN integration, code minification, browser caching, and more.
You can use caching plugins such as WP Rocket and NitroPack without manually fiddling with the settings. However, a caching plugin like W3 Total Cache requires manual modification in order to enable caching on the website. Here are some of the benefits W3 Total Cache offers:
- Search engines like Google prefer faster websites and rank them higher. Your site will perform better in the search results.
- It reduces page load time which creates a better user experience. This encourages users to spend more time on your website and view more products and pages.
- Using HTML, CSS, and JS file minifications, you can save up bandwidth.
W3 Total Cache is one of the best WordPress caching plugins. It is easy to configure, and with the help of this tutorial, anyone can set up this plugin. Caching helps you reduce server response time and boost overall site performance.
Things To-do Before Configuring W3 Total Cache Settings
1. Check your existing page load speed using tools like Pingdom or WebPageTest. Take a screenshot or download the results if possible.
2. If you use any other caching mechanism, you need to turn it off before installing W3 Total Cache.
3. Set up a staging site to test your changes. Please don’t try this tutorial on a live website.
After that, you can follow these steps to properly set up the W3 Total Cache plugin on your WordPress website.
Step 1: Download and Install W3 Total Cache Plugin
- Log into your WordPress site. Go to Plugins > Add New.
- Search for “W3 Total Cache” in the plugin’s directory.
- Click on the “Install Now” button and wait for a moment.
- Click the Activate button.
Step 2: How to Configure Basic Settings in W3 Total Cache
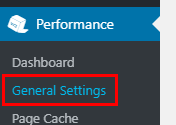
Go to the “General settings” page to make these changes.
Preview Mode
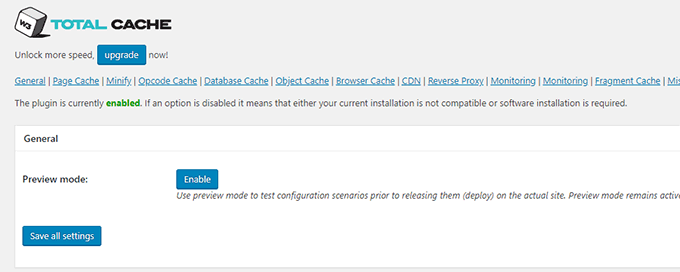
Enabling Preview mode will help you test the changes on the website before making them live.
I would recommend using the preview mode to test the configuration. Once you are confident that your website is working fine, you can deploy those changes.
Page Cache
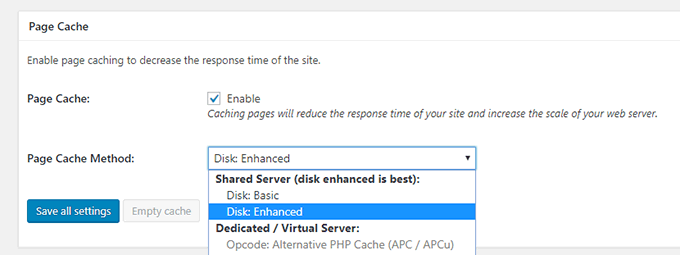
Enabling the page cache will make your site considerably faster. If you don’t have technical skills, then using only “Page Cache” is enough to speed up the website.
Check the box in front of Page Cache to enable this feature. Make sure that under the “Page Cache Method,” the Disk Enhanced method is selected.
Minify
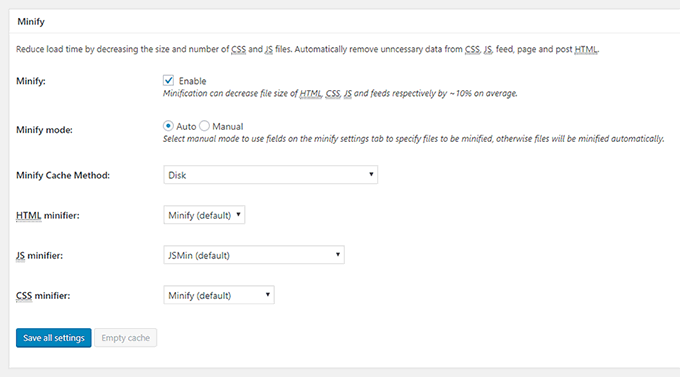
Important: I would strongly recommend enabling “Preview Mode” before fiddling with Minify if you are testing it on the live website.
Enabling the Minify option will improve your site speed by at least 10%. It will reduce the size of your site’s JavaScript, CSS, and HTML files.
Click on the Enable check box to turn on Minify. It might show you a warning; if that’s the case, click on the “I Understand the Risk” button.
Keep other settings to “Auto,” then click on the Save Settings & Purge Caches button. It will enable essential minification.
Database Cache
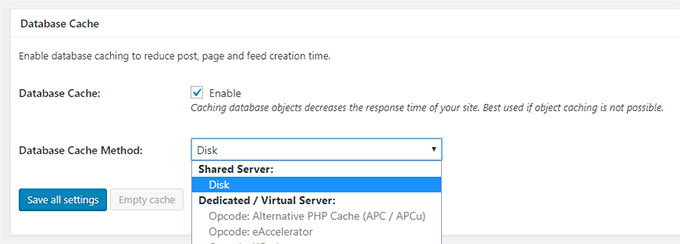
Enabling the database cache will improve the speed of database queries. It will make the site’s backend load much faster. However, If you are using shared hosting, then best keep it disabled.
By keeping the default settings, you can enable this feature. Test it in the preview mode, then Deploy.
Object Cache
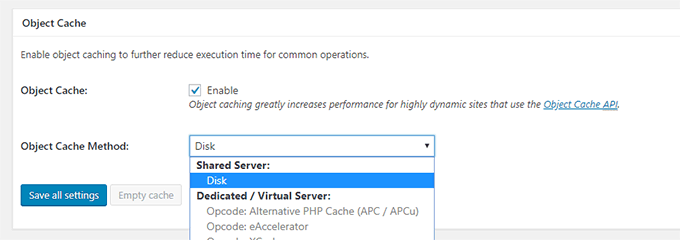
This feature will further enhance the speed of everyday database operations. However, like the Database cache, enabling it on a shared server might slow down your site. If that’s the case, then keep it disabled.
Enable Object Cache by clicking on the checkbox. Select “object cache method” to Disk. Test in the preview mode, then deploy.
Browser Cache

Reduce server load and response in a user’s web browser. It will save a copy of a page in the user’s browsers. Next time the user visits a page, this copied version will load on their browser.
Enable by clicking on the checkbox. Click on the “Save Settings and Purge Cache” button.
CDN (Content Delivery Network)
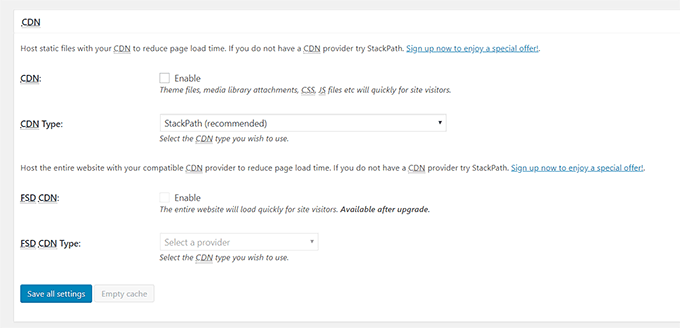
If you are using a CDN already, you can enable this feature. However, you must contact your CDN provider or check their knowledge base for instructions to correctly configure this feature.
If you are not using any CDN service at the moment, then you can skip this option for now.
Step 3: How to Configure Advanced Settings in W3 Total Cache
By using the above general settings, you can improve your site speed. However, if you want to improve your site’s performance further, you can enable more features in W3 Total Cache.
Page Cache
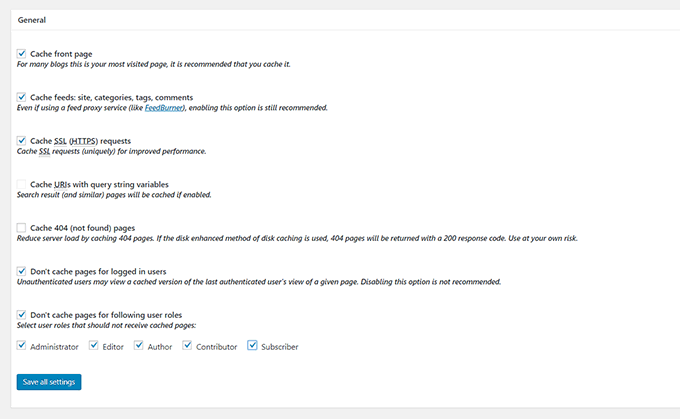
Under the Performance menu in your WordPress sidebar, select Page Cache.
From the General tab, turn on these settings:
- Cache Front Page
- Cache feeds: site, categories, tags, comments
- Cache SSL (HTTPS) requests
- Don’t cache pages for logged-in users
- Don’t cache pages for following user roles (Select All the options)
The rest of the options on the page cache are a bit advanced, and I recommend keeping them as-is for now.
Minify
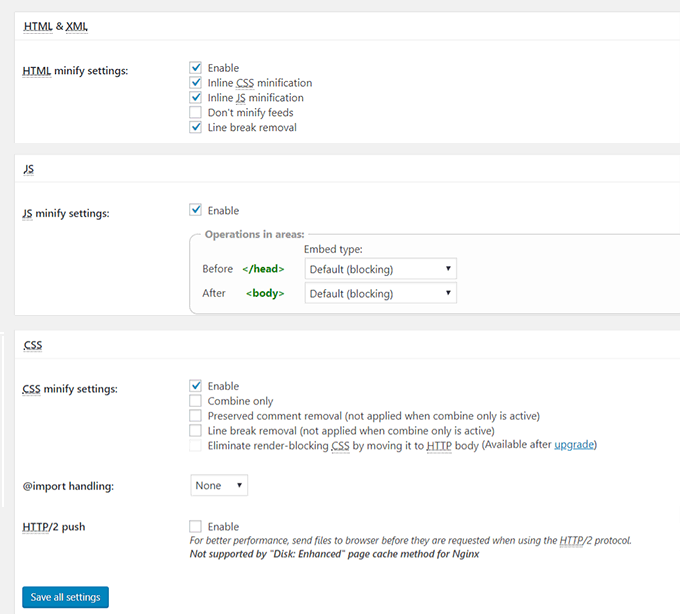
On this page, you will find all the advanced settings to minify JS, CSS, and HTML further.
Since we have selected the “Auto” minification in the general settings, we need to change it to “Manual” first. The author recommends using the auto option, but if you want, you can further minify. Here’s how:
- Under HTML & XML tab, select all the options except “Don’t Minify Feeds”.
- Enable JS Minify settings from the JS tab.
- Enable CSS Minify Settings from the CSS tab.
Browser Cache
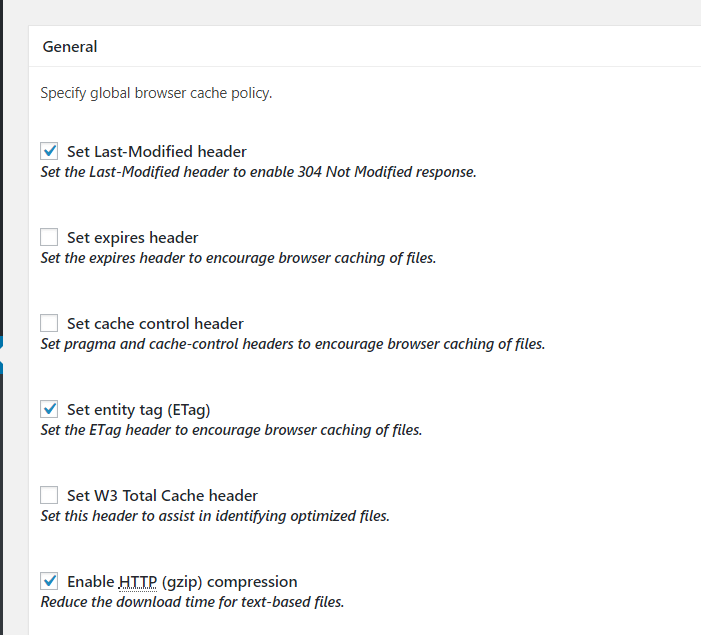
Now, let’s see how we can enable more options on the browser cache page.
This page comes pre-configured if you enable this feature from the general settings page. Make sure that these settings are selected under all the tabs:
- Set Last-Modified Header
- Gzip Compression
- Prevent caching of objects after settings change
After applying settings in W3 Total Cache, you can use tools like Pingdom and WebPageTest to test your page load time.
Most websites immediately see a performance improvement when they use W3 Total Cache. If you want to try out different caching plugins then check out this comparison of WP Super Cache vs WP Fastest Cache.

