Last Updated on by Azib Yaqoob
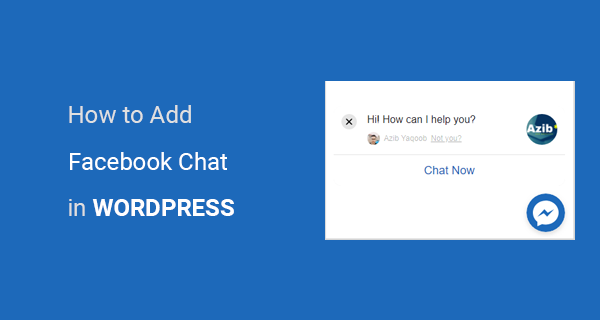
Do you want to add Facebook chat to your WordPress website? Here is a step by step tutorial which anyone can follow to add Facebook chat on a WordPress website.
If your business relies heavily on chatting with new and existing customers, I think you will love this Facebook chat integration. It will give your audience an easy way to ask questions or get quotes for your services. Both your customers and you can communicate through mobile and desktop computers by using Facebook messenger website/app.
If you’re having trouble optimizing your WordPress website then check out my WordPress SEO guide for beginners.
Benefits of Using Facebook Chat on Your Website
- You will get instant notification on your mobile or desktop when someone initiate a chat
- You can reply your customers in real time instantly
- It will save chat history between customers and you. You both can continue this conversation at some point in future
How to Add Facebook Chat to a WordPress Website
Here’s what you need to do:
Note: In order to create this Facebook chat experience, you must have a Facebook user account and a facebook page.
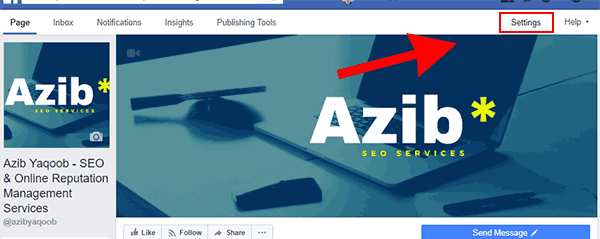
Step 1: Go to your Facebook page and click on the ‘Settings’. Find and click on the button which says ‘Messenger Platform’ in the left sidebar menu.
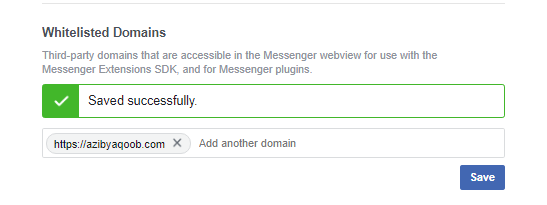
Step 2: Scroll down this page and you will find an option ‘whitelisted domains’. You need to add your website domain name and Press the ‘save’ button.

Step 3: On the same page when you scroll down further you will find ‘Customer Chat Plugin’ section. Click on the ‘Set Up’ Button.
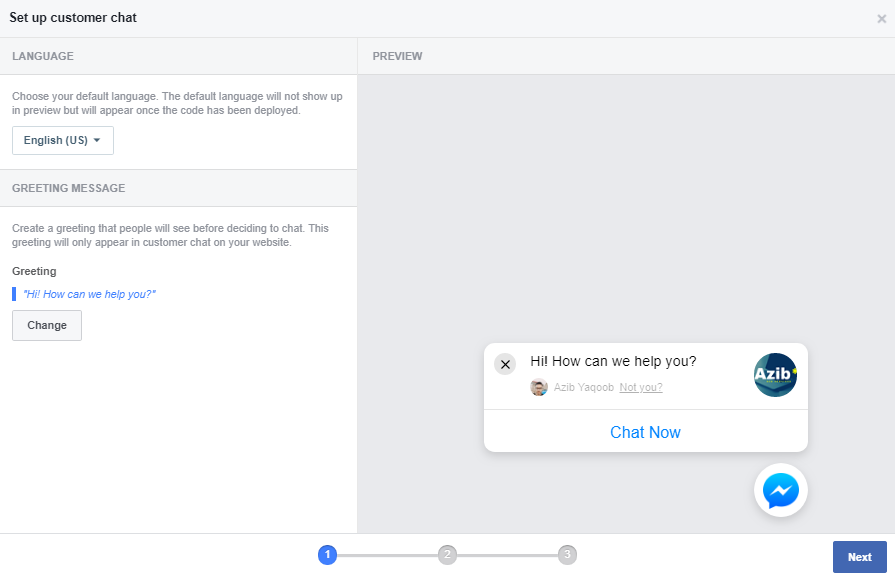
Step 4: It will ask you to set a greeting message. This message will show up whenever a customer will click on the Messenger button on your website. Click on the ‘Change’ button to set a custom message or let it be. It’s totally your call.
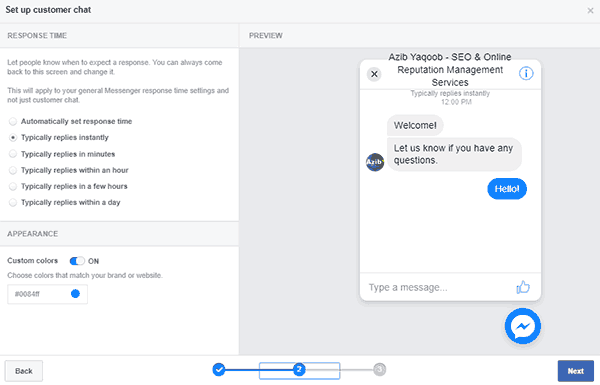
Step 5: Configure a response time. You can also modify your messenger button color by clicking ‘Custom Colors’ to ‘On’. You can add any Hexadecimal color code here.
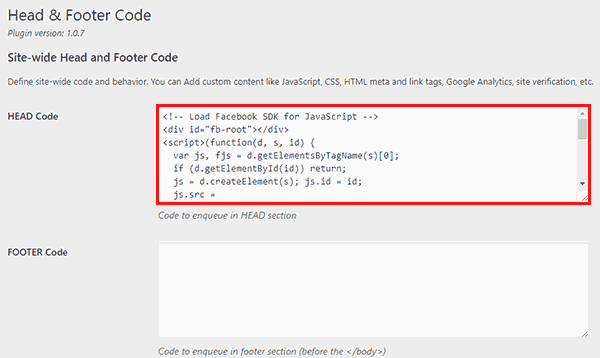
Step 6: Copy this code. Login to your WordPress website and add that code to HTML Head section. If you have no idea where this section is located, then you can install Head & Footer Code plugin and add your code.
How to customize the Facebook chat Output
Note: A bit of CSS and HTML know-how is needed to perform these steps
In case, you want to improve chat box appearance, you can edit the code provided by Facebook.
To hide the greeting message, you can add this code to div class="customer-chat":
greeting_dialog_display="hide"
Similarly, you can delay the chat greeting dialog load after a certain number of seconds. You need to add this piece of code to div class="customer-chat":
greeting_dialog_delay="5"
Change the number of seconds as you like.
Let me know in the comments if you face any trouble. If you are interested to get more leads through Facebook advertising, then also check out this post on how to set up Facebook retargeting ads. Also, check out this post to troubleshoot Facebook Pixel errors.

