Last Updated on by Azib Yaqoob
WordPress is one of the most popular content management systems (CMS) in the world, powering over 40% of websites. However, its popularity makes it a prime target for hackers. To keep your site safe, setting up a free WordPress security plugin is one of the best steps you can take. In this tutorial, I’ll walk you through everything you need to know about choosing, installing, and configuring a free WordPress security plugin to protect your site effectively.
Table of Contents
Why Your WordPress Site Needs a Security Plugin
WordPress sites face threats like brute force attacks, malware infections, and spam. While WordPress itself offers a secure foundation, it’s essential to bolster your defenses with a dedicated security plugin. Here’s why:
- Prevent Unauthorized Access: Security plugins can block malicious login attempts.
- Detect Malware: Regular scans ensure your site stays free from harmful files.
- Stop Spam Attacks: They protect contact forms and comments from bots.
- Harden Core Features: Security plugins improve default WordPress security settings.
Best Free WordPress Security Plugins
Before diving into the setup, let’s explore some popular free WordPress security plugins. These plugins provide excellent protection at no cost:
- Wordfence Security: Offers a firewall, malware scanner, and real-time threat monitoring.
- Sucuri Security: Features a site firewall, malware scanner, and post-hack recovery tools.
- iThemes Security: Focuses on brute force protection, two-factor authentication, and database backups.
- All In One WP Security & Firewall: A beginner-friendly plugin with features for login security, file monitoring, and firewall rules.
For this guide, we’ll use Wordfence Security as it’s one of the most comprehensive and user-friendly plugins.
Step 1: Install the Wordfence Security Plugin

1. Access the WordPress Dashboard
Log in to your WordPress admin panel. From the dashboard, go to Plugins > Add New.
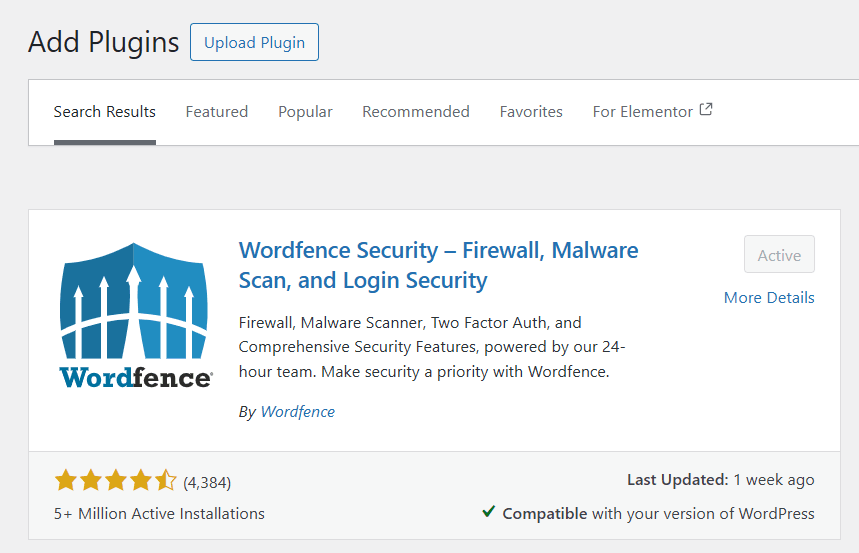
2. Search for Wordfence
Type “Wordfence” in the search bar and hit Enter. Locate the Wordfence Security – Firewall & Malware Scan plugin in the results.
3. Install and Activate
Click Install Now and wait for the installation to complete. Once done, click Activate to enable the plugin.
Step 2: Initial Configuration
1. Set Up Wordfence
Once activated, Wordfence will guide you through a setup wizard. Follow these steps:
- Email Address: Enter your email to receive security alerts.
- License Agreement: Agree to the terms and choose the free plan.
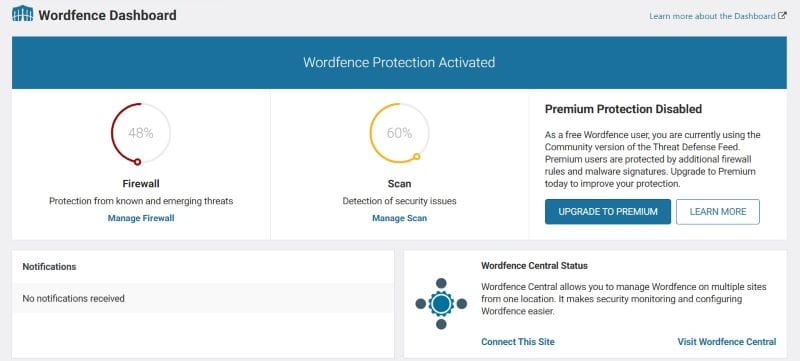
2. Dashboard Overview

After setup, navigate to Wordfence > Dashboard. You’ll see a summary of your site’s security status, including threats detected, recent login attempts, and scan results.
Step 3: Configure the Firewall
Wordfence’s firewall protects your site from common threats by filtering malicious traffic.
1. Enable the Firewall
- Go to Wordfence > Firewall.
- Click Optimize Firewall to configure it for your hosting environment.
- Follow the prompts to download a backup of your
.htaccessfile. Wordfence will automatically optimize the firewall for your server.
2. Block Malicious IPs
- In the firewall settings, enable automatic IP blocking for repeated failed login attempts or known malicious activity.
Step 4: Perform a Malware Scan

Scanning your site regularly helps identify vulnerabilities and malware.
1. Run a Manual Scan
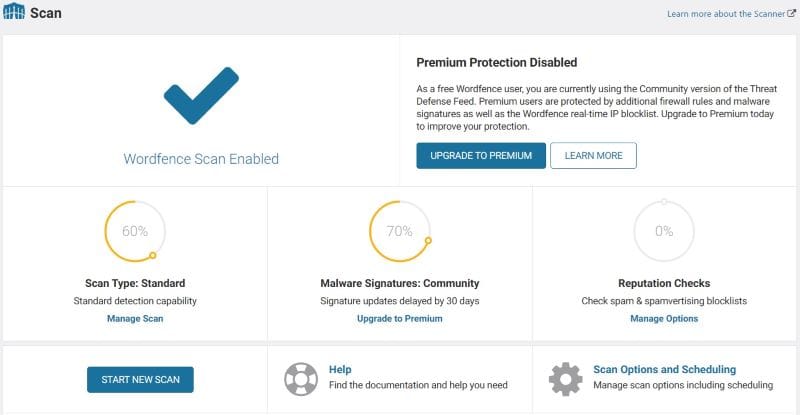
- Navigate to Wordfence > Scan.
- Click Start New Scan to initiate a full scan.
- The plugin will check core files, themes, plugins, and your database for suspicious changes or malware.
2. Review Scan Results
After the scan, review the results. Wordfence categorizes issues by severity. For any critical issues, click View Details to understand the problem and follow the plugin’s recommendations.
Step 5: Harden Your WordPress Site

Wordfence provides several hardening options to improve your site’s security.
1. Two-Factor Authentication (2FA)
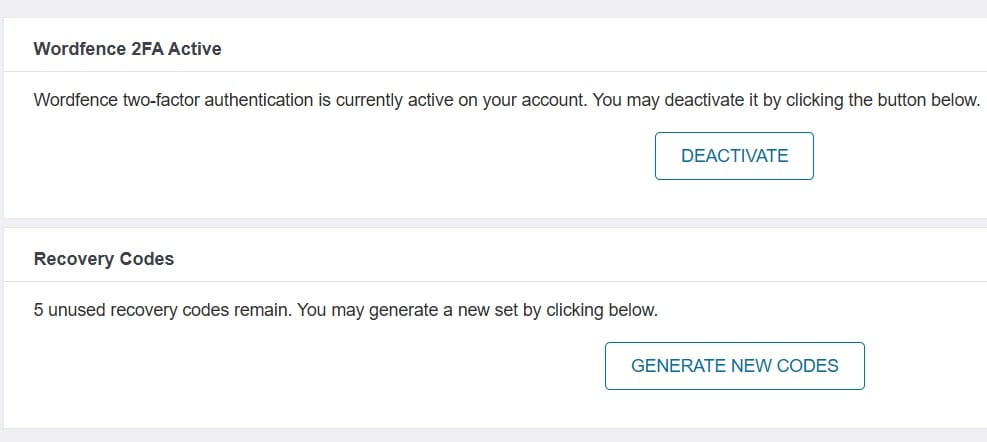
- Go to Wordfence > Login Security.
- Enable two-factor authentication to add an extra layer of login protection.

2. Disable XML-RPC
This feature is often exploited by hackers for brute force attacks. Disable it under the Login Security settings.
3. Limit Login Attempts
Restrict the number of failed login attempts to prevent brute force attacks. Adjust these settings in the Login Security tab.
Step 6: Set Up Email Alerts
Stay informed about potential threats with real-time alerts.
1. Configure Email Alerts
- Go to Wordfence > All Options > Email Alert Preferences.
- Enable notifications for high-severity issues like failed logins, malware detection, and firewall block events.
Step 7: Test Your Security Setup
Before finalizing, it’s essential to test your security setup.
1. Check Firewall Functionality
Use Wordfence’s Live Traffic feature to monitor blocked attempts. This confirms the firewall is working effectively.
2. Test Login Security
Try logging in with incorrect credentials to ensure brute force protection is active.
Step 8: Maintain Your Security
Security isn’t a one-time effort; regular maintenance is crucial.
1. Update Plugins and Themes
Keep your WordPress installation, plugins, and themes up to date to avoid vulnerabilities.
2. Schedule Regular Scans
Configure Wordfence to run automatic scans weekly and review the reports.
3. Backup Your Site
Install a backup plugin to regularly save your site’s data. Wordfence integrates well with backup tools like UpdraftPlus.
Common Mistakes to Avoid
- Skipping Plugin Updates: Outdated plugins are a significant security risk.
- Ignoring Alerts: Pay attention to email alerts for real-time threats.
- Overlooking Backups: Always have a backup plan in case of a cyberattack.
Adding a free WordPress security plugin like Wordfence is one of the best ways to protect your site from cyber threats. By following this guide, you’ve secured your site with a powerful firewall, malware scanner, and additional hardening measures. While free plugins offer robust protection, consider upgrading to premium plans for advanced features as your website grows.
Need expert help with securing your WordPress site? Contact me today for a consultation!

